What Are Digital Scrapbooking Brushes?
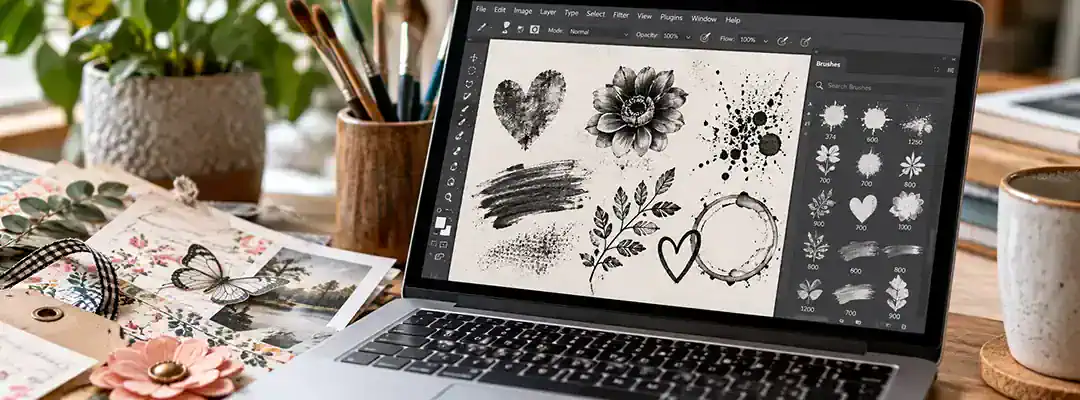
Digital brushes are reusable shapes and textures that you “stamp” onto your layout with a single click. They live inside your editing software, and you can resize, rotate, and recolor them as often as you like.
Let’s talk digital brushes. If you’re a digital scrapbooker and you’ve ever looked at a gorgeous mixed-media layout and wondered, “How’d they do that?”, chances are—yep, brushes were involved.
Now, I’m not talking about the kind of brushes you use to paint a wall or sweep up glitter (although glitter in my keyboard is a thing). I’m talking about digital brushes—magical little tools inside programs like Photoshop and Photoshop Elements that can help you stamp, texture, distress, paint, smudge, scribble, and more—all with a single click.
Most digital brushes are used just like physical rubber stamps. You choose a color, select a brush tip, and “stamp” it into your layout by clicking once with your mouse (or stylus) on a new layer. Always stamp on a new layer! That way, you can recolor it, adjust it, move it—or delete it entirely without affecting the rest of your page. Trust me, Future You will thank you.
And once you start using them, ohhh, it’s hard to stop. Ask me how I know!
How Do Digital Brushes Work?
A digital brush is basically a shape or pattern that you can “paint” with. Think of brushes as fancy digital stamps that can be scaled, rotated, layered, and recolored—and unlike a rubber stamp, they never run out of ink.
Brushes come as .abr files and can be used in all sorts of creative ways—from adding grungy texture and painty splatters to stamping titles, foliage, or artsy frames.
In my shop, you’ll find all sorts of digital brushes:
- Decorative ones for accents or photo edges
- Grungy, textured ones that add grit, texture, and depth
- Word art brushes that can double as journaling, titles, or just a little extra interest
Some are playful, some are moody—but all are oh-so-fun.
Which Programs Can Use Digital Brushes?
The digital brush format .abr format was created for Photoshop ©, but here’s the good news—you don’t need Photoshop to use digital brushes.
- Photoshop and Photoshop Elements use .abr files natively.
- Photopea (free and browser-based) opens .abr files directly.
- Affinity Photo imports .abr files, and it’s now free with a Canva account.
- GIMP can load most .abr files, although some newer brush files don’t import perfectly.
If your program won’t cooperate with .abr files, don’t worry—the PNG versions I include (more on those below) have you covered.
How to Load Digital Brushes Into Your Software
Before you can stamp, you need to load the brush set. It only takes a minute:
- Photoshop Elements: Select the Brush tool (B), open the brush picker in the Tool Options bar, click the small menu icon, and choose Load Brushes. For a full walkthrough with screenshots, see my tutorial on loading brushes into Photoshop Elements.
- Photoshop: Go to Window > Brushes, click the panel menu (the little lines in the corner), and choose Import Brushes.
- Photopea: Go to File > Open and choose your .abr file. The brushes are added to your brush list automatically.
How to Stamp Your First Digital Brush
Ready to try it? Here’s the whole process from start to finish:
- Create a new layer (Layer > New > Layer, or Shift+Ctrl+N on a PC / Shift+Cmd+N on a Mac). Always create a new layer before “stamping” a brush so you can delete that layer if you don’t like it or change your mind.
- Select the Brush tool (B) and pick the brush you want from your brush list.
- Choose a color. I love grabbing one straight from my photo with the Eyedropper tool—it helps everything feel like it belongs together.
- Size your brush using the bracket keys: [ makes it smaller and ] makes it bigger.
- Click once where you want the stamp. Just one click—if you drag, you’ll smear it into a stretched-out mess (ask me how I know that one, too).
- Adjust to taste. Lower the layer opacity for a softer look, or try a blend mode like Multiply or Soft Light so the texture sinks into your paper.
That’s it! You just stamped your first digital brush.
Digital Brush Troubleshooting: Quick Fixes
“I clicked and nothing happened.” Check that your layer isn’t hidden or locked, that your opacity isn’t set to zero, and that you’re not stamping white on a white background. (I’ve done all three.)
“My stamp looks blurry or pixelated.” Every digital rush has a native size, and making it bigger than that softens the edges. Photoshop Elements also caps brushes at 2500 pixels. If you need a really large stamp, use the PNG version instead and scale it with care.
“I loaded my brushes, but I can’t find them.” New brushes usually show up at the very bottom of your brush list or as a new group in your Brushes panel. Scroll all the way down—they’re hiding there.
“Can I use brushes in projects I sell?” That depends on the license. Personal use (PU) means your own projects only, and commercial use (CU) is required if you’re selling what you make. Always check the terms of use included with your download.
What About Those PNG Files?
You’ll often see that designers (me included!) provide PNG versions of each brush tip in a brush set.
Here’s why:
- Not every program supports .abr files.
- Some people prefer to use brushes as drag-and-drop PNG stamps for more control.
- You can layer, resize, or clip photos or papers to them easily. And scrapbookers love to colorize them!
If you don’t use the PNGs? It’s totally fine to delete them or move them to a separate folder to save space.
Ready to Play?
If you’re ready to dip your toes (or whole self) into the world of digital scrapbooking brushes, take a peek at the brush section in my shop—there’s something for everyone. Whether you want to add a subtle texture or go full-blown mixed media, I’ve got you covered.
🦋
Ready to Begin?
If you’re feeling stuck and would love a little company as you find your way back, Begin Anywhere is a free 7-day email series of gentle prompts to help you move past the blank page and return to your creative practice — whether that means a digital scrapbook page or an art journal page. No pressure. No perfection required. Just a kind little nudge from a friend who knows how hard it can be to begin again.
Want to Go Deeper?
Start Where You Are: A Creative Recovery Guide for Digital Scrapbookers is the book I wish someone had handed me during my own creative winter. Nine chapters, three bonus resources, and one simple promise: you’re not broken, this is temporary, and here’s how to start moving again.
0 Comments