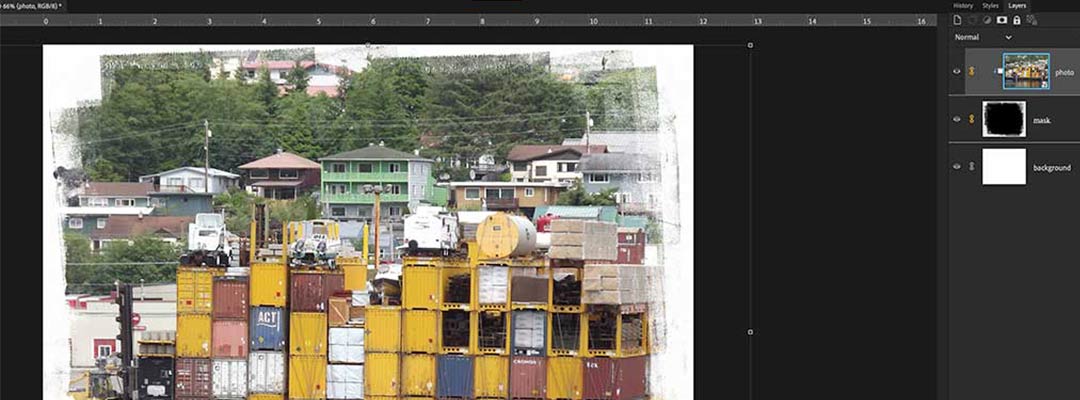
What are Photo Masks?
A photo mask, sometimes also referred to as a clipping mask, is a shape that uses the content and transparency of one layer to control the visibility of another layer. In other words, a clipping mask defines how much of the layer below it is visible boundaries once the two are “clipped” together. The shape can be rectangular, square, circular; it can have defined edges or be freeform. Basically, anything can be used as a shape, and all you need is something else to attach (clip) to it.
In digital scrapbooking, the shape is usually (but not always) a black PNG file to which you would clip a photograph or a digital paper.
There are two important rules for using clipping masks:
- Rule 1: A mask layer is always placed beneath the photo or paper or other element that is going to be clipped to it.
- Rule 2: The photo (or paper or other element) must be larger than the mask.
Also note:
- You can only clip only successive layers — meaning there cannot be other layers in between the shape and what you are clipping to.
- The name of the base layer (in the Layers Panel} to which other layers are grouped will always be underlined.
- The thumbnails for the layers that are clipped to the base will always be indented and will display the clipping mask icon.
Using a Mask
The process for using “clipping masks” is the same in Photoshop and Photoshop Elements:
- Begin by dragging a photo layer over the mask layer. Make sure that the photo layer is directly above the mask layer. If it isn’t, use the Move tool to drag the layer directly above the mask layer.
- The photo must be large enough to completely cover the mask. Use the corner handles to resize the photo if necessary.
- With the photo in place, move your cursor between the photo layer and the mask layer. Press the Alt key (Mac: Opt key) on your keyboard. As you do this, your cursor changes to a double-circle arrow. When this occurs, click once. The photo will take the shape of the mask or layer beneath it. Alternatively, from the Menu, choose Layer>Create Clipping Mask.
- When you are satisfied with how the layers are clipped together, select all of the clipped layers and click the little chain to the left of one of the layers to “link” the layers so that they move together if you need to reposition. Or, press Ctrl E (Mac: Cmd E) to merge the two layers together.
Fun Tips
- You can use digital papers or textures to clip to your mask, not just a photo, and then have fun experimenting with the blend mode and opacity of the paper (or photo) layer to create different effects. In the sample photo, I have clipped a paper (top layer) to a photo layer that is clipped to the mask shape.
- Try using some of Photoshop’s/Elements built-in shapes as a mask — there are lots of fun shapes available. The Custom Shape Tool is located in the Draw section of the Tools bar in Photoshop Elements and is nested with the Rectangle Tool in the full version of Photoshop.
I’ve got lots of masks in my shop such as the sets below. Check them out and then have a play! If you try this tutorial, I’d love to what you’ve done! Post it in my Oscraps Designer gallery.


Great tip! I’ve used rectangles and other shapes as a mask to “crop” a photo but didn’t think about doing this.
So glad you liked my tip, Tawyna!